- By
- September 24, 2025

As we know most people are heading toward cloud hosting. Why? Because its speed & features are tremendous and easily scalable. Today we’ll cover the best web hosting called DigitalOcean, and WordPress Installation On Digitalocean in a single-click application.
If you have worries regarding the transfer of your website from one hosting to another then it’s not a big deal. You can easily increase your server configuration, which you don’t get in shared hosting. If you’re looking for DigitalOcean alternatives that you can easily handle then site ground cloud hosting could be a good choice. Why? Because site ground speed & uptime are fabulous. Consider, if you can’t manage this complex server.
Note: Single click feature works only in a single droplet, If you store multiple websites in a single droplet, you should know about Linux coding or you can find code on the internet.
If you want to avoid propagation time, it would be better to replace your domain name server with DigitalOcean’s name servers.
Here are the Digitalocean name servers.
ns1.digitalocean.com
ns2.digitalocean.com
ns3.digitalocean.com
So, let’s begin,
Create a new account, if you’re new to DigitalOcean apply the coupon and get $200 credit free in your new account. Apply now.
When you finish all the setup you will enter your main dashboard. To start, click on to Create button, and choose droplet.

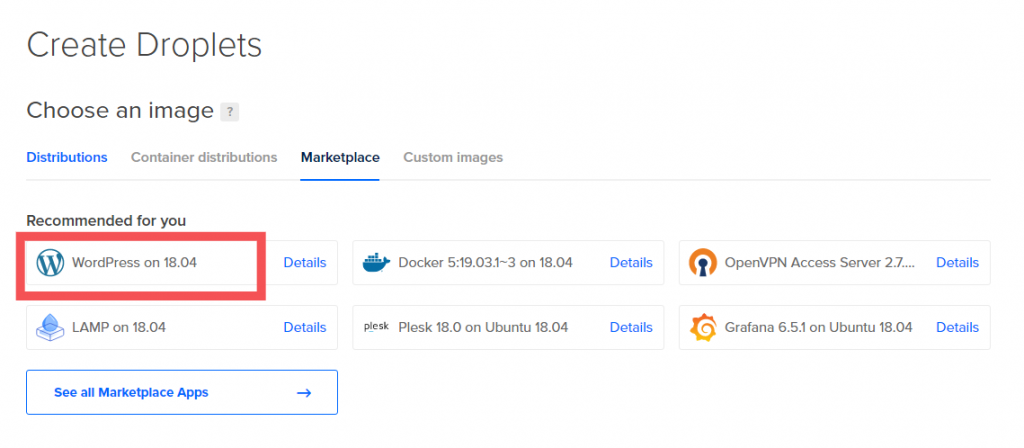
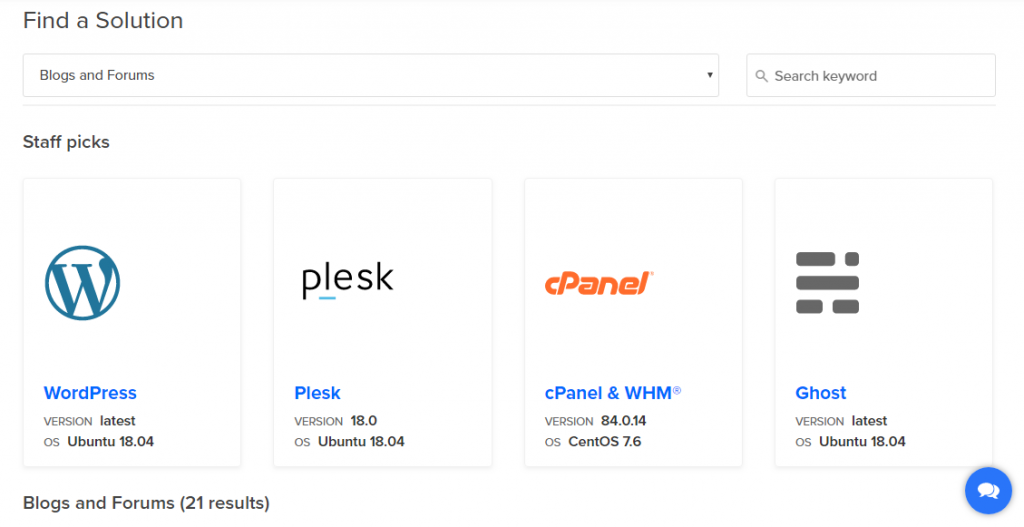
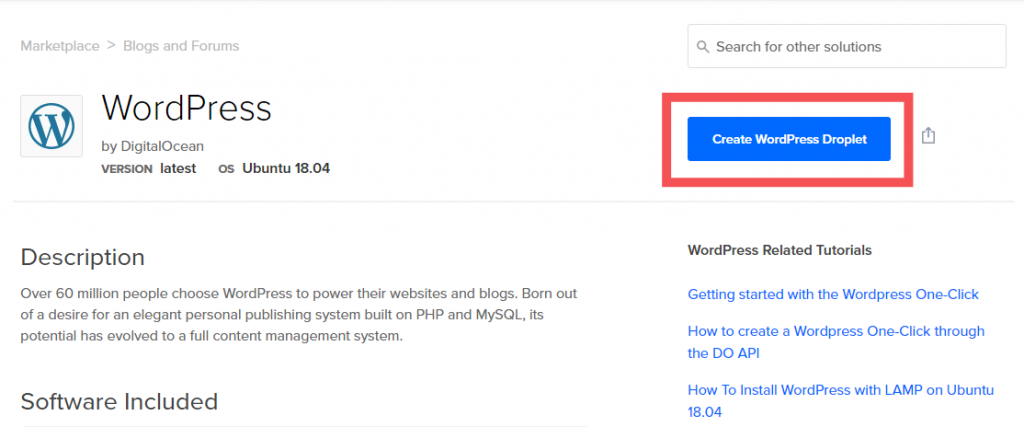
To create a droplet, click the marketplace tab. As you can see in the below image, WordPress is in the top position. If you didn’t find WordPress, so click “see all marketplace apps.” You will see multiple WordPress apps but don’t get confused. We have to install “Ubuntu OS version WordPress.” In my case, “Ubuntu 18.04”. Simply click, now to create a WordPress droplet.
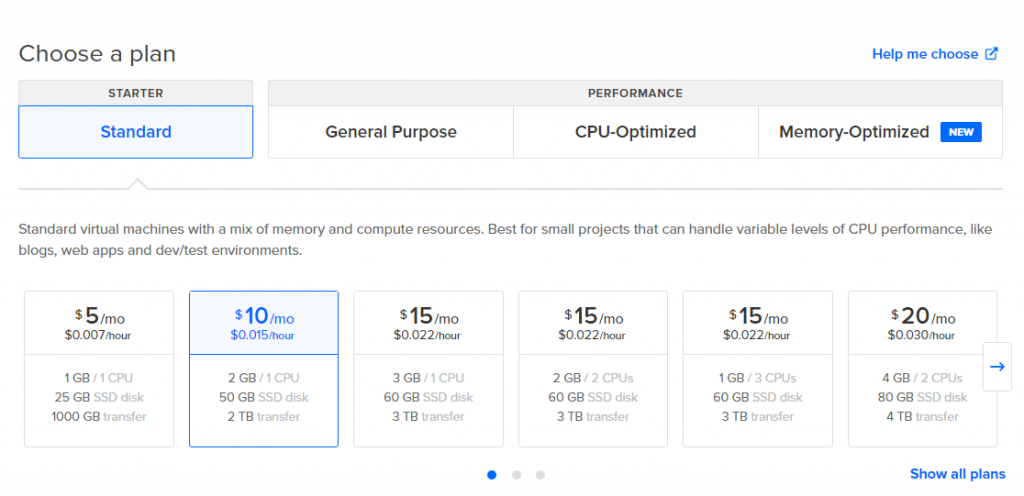
Now choose a plan according to your budget, I choose the $10 monthly plan. Don’t worry you can apply the DigitalOcean promo code above and get a $200 free credit discount.
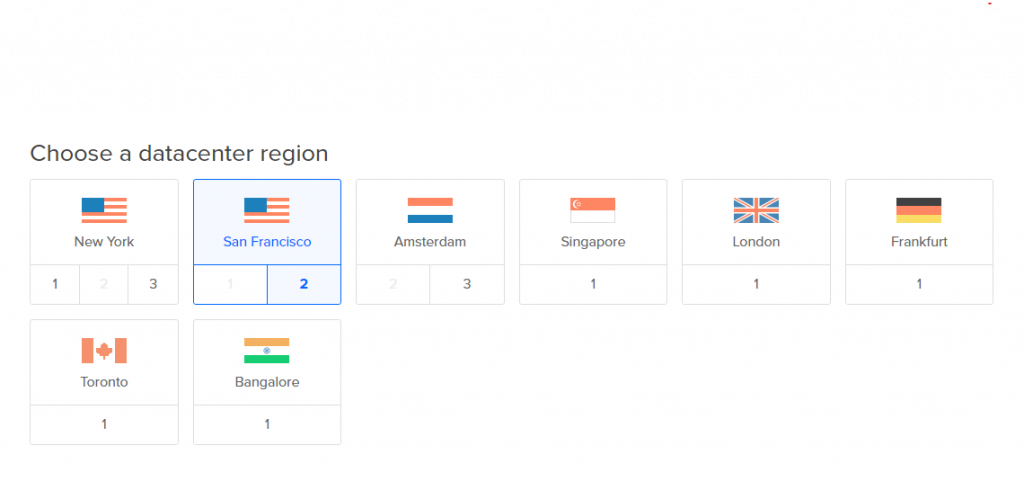
Next part, choose the datacenter region: choose wisely the datacenter, closest to your city. I will choose “San Francisco”, you can choose anyone who fits your business & where you serve your services.
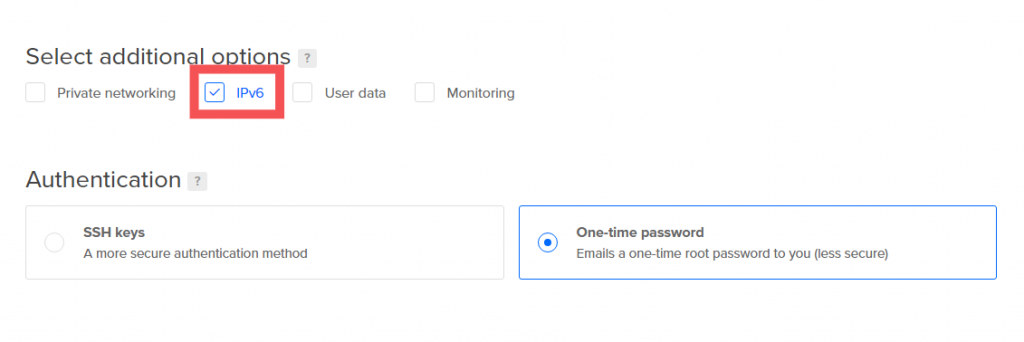
Come to the next point. “Select additional options” select the IPV6 checkbox. Authentication I will leave a “one-time password”, you can set SSH keys to secure your droplet later.
Choose a hostname. Now give the name of your droplet “You can write your website name also”. I always prefer to write my site name.
Backup option. It’s totally up to you whether you want to back up your website or not. This feature is not free you will have to pay additional money.
Now click the create droplet button, that’s it. Your droplet has been successfully created.
Here we go, Main part is completed. You will get an email from DigitalOcean, where they provide you a droplet name and password.

Before starting the further process, I assume that your name servers have been updated. Check your name server propagation status here. Why do I insist you change your name servers first? Because you can face problems accessing your website until your name servers not updated successfully.
Now, you have to change your default droplet password and install WordPress on DigitalOcean. Windows users you need putty software, Download here or go to your droplet and click the 3 dot icon, open the access console.
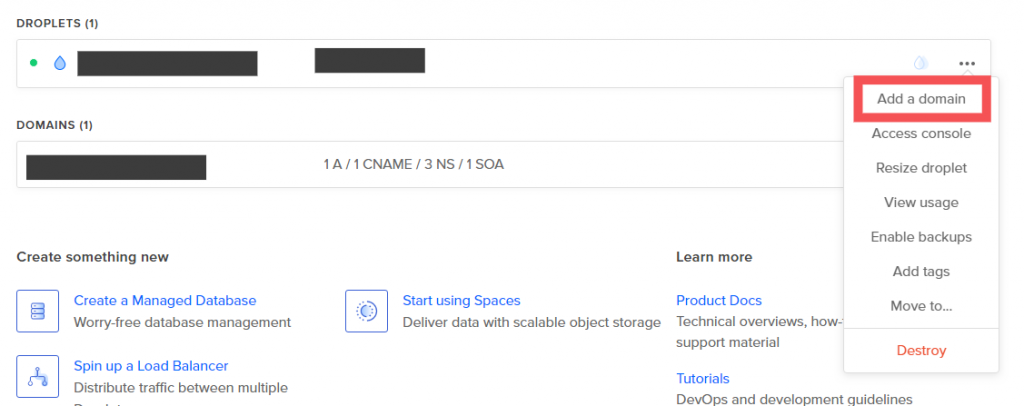
Access the console directly in your droplet
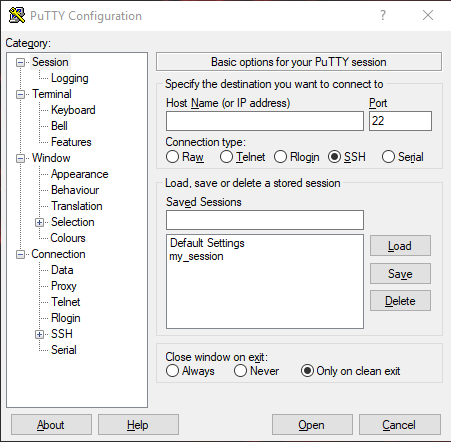
> Open putty software
> Find the IP address in your droplet or in your email. Paste in (Hostname or IP address) area
> Port will be 22
> Now click the open button, click yes, to the dialog box
>Enter your IP address
Enter your login details:
Your username will be root, and go to your Gmail and copy the root password from there.
“Click the right mouse button to paste the password, Don’t worry password will not be visible, just right-click and hit enter”
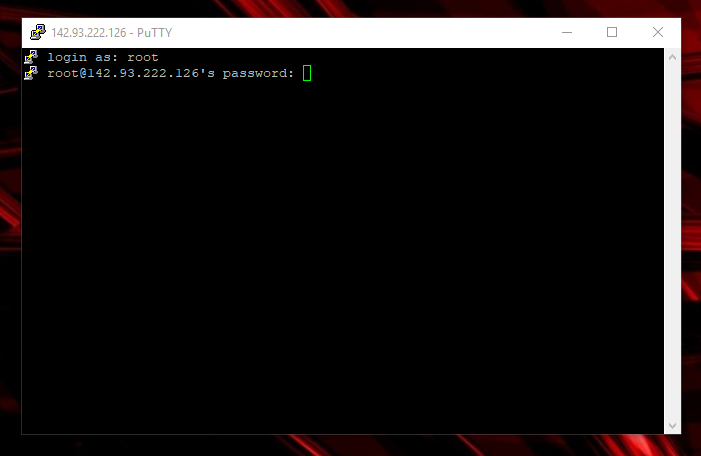
Click the right button to paste the password.
Next, enter your username (root) and password that was emailed to you earlier. You’ll be immediately asked to create a new password for the root user account. Once you’ve reset the root password, you should see a message similar to the one above.
Hurray! Now WordPress has been enabled.
To check whether your WordPress is enabled or not. Copy your IP address from your droplet. Paste in a new tab and hit enter.
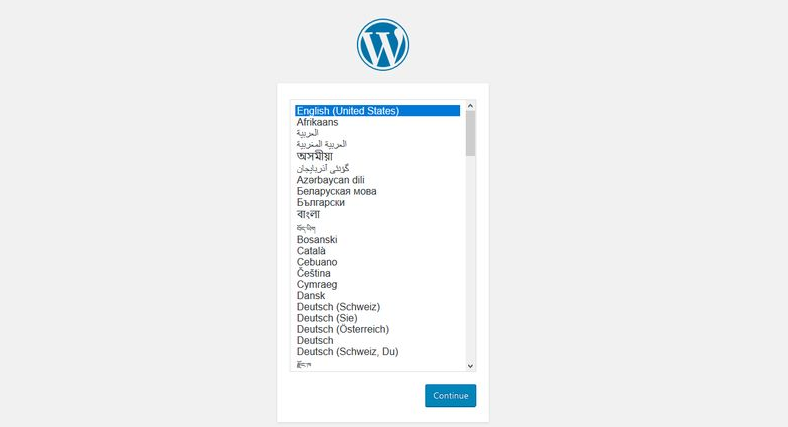
The process is starting to set up WordPress on your server.
1. Choose your language, continue
2. Write your Site Title
3. Your username (Where you can manage your website in the backend)
4. Set a strong password
5. Put your email address
6. Hit, install WordPress
Now you’re ready to use WordPress. Now login to your WordPress. You might be wondering, why it showing an IP address instead of the website URL. Because we didn’t add the domain in our droplet. So let’s configure.
Go to your DigitalOcean account and open the project, you created recently.
Now click on the 3 dot icon in front of your droplets. And click “Add a domain”. Then, enter your domain name.
I have put a dummy domain name “example.com”, You put your own domain name without using any HTTP or www. Now click the ( add a domain ) button. You will get the notification “abc.com was added to your project”.
Now click on the “CNAME” tab. write “www” in “enter hostname”. Enter your website name (abc.com) in “Enter @ Hostname”.
Now you’re able to access your website with your domain name. One last step remains. Go to your WordPress backend, you will see your website backend still open with your IP address. And you have to change this. Log in to your WordPress account.
Remove your IP address and paste your website domain, like (http://abc.com) or (https://abc.com).
Note: Use https only if you have purchased SSL or you get free with your domain. Otherwise, you can’t access your website easily. If you don’t know if SSL is working or not. Simply use “HTTP”. (http://abc.com), You can change it later.
I hope you enjoy this tutorial on WordPress Installation on DigitalOcean. Don’t forget to apply the DigitalOcean promo code.
Thanks For Reading.
Also, read.
how-to-start-a-blog-for-free-in-2020